Auto-Tracking docs
How to connect your Gmail account for auto-tracking
Connect Gmail once and ClearTrack finds your courier and order emails automatically. It takes about a minute.
1Start auto-tracking setup
On your dashboard, click Complete Setup on the 'Finish Setting Up Auto-Tracking' banner, or click Connect Gmail in the top-right corner.
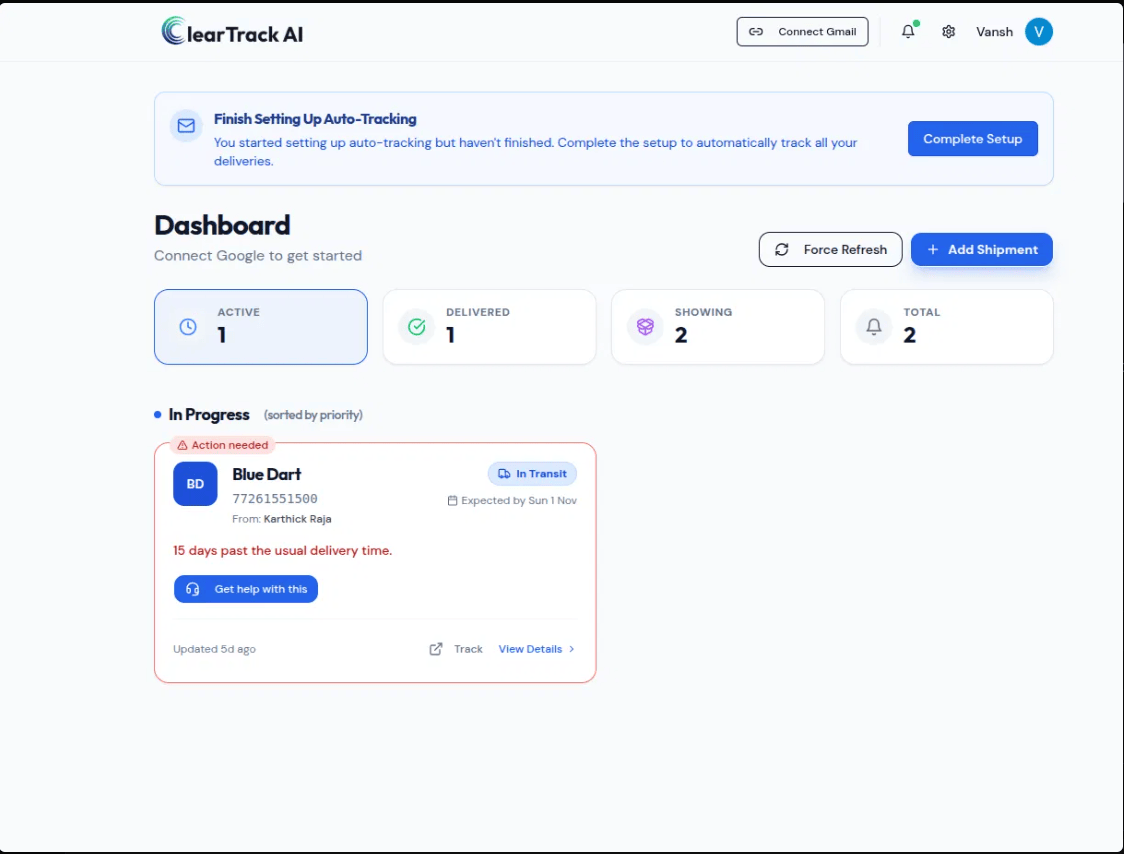
2Choose Gmail mode and Connect Gmail
Choose Gmail mode, then Connect Gmail (recommended). Click the blue Connect Gmail button. Google's screen will show 'Nango', the secure connector we use. We only read courier and return emails.
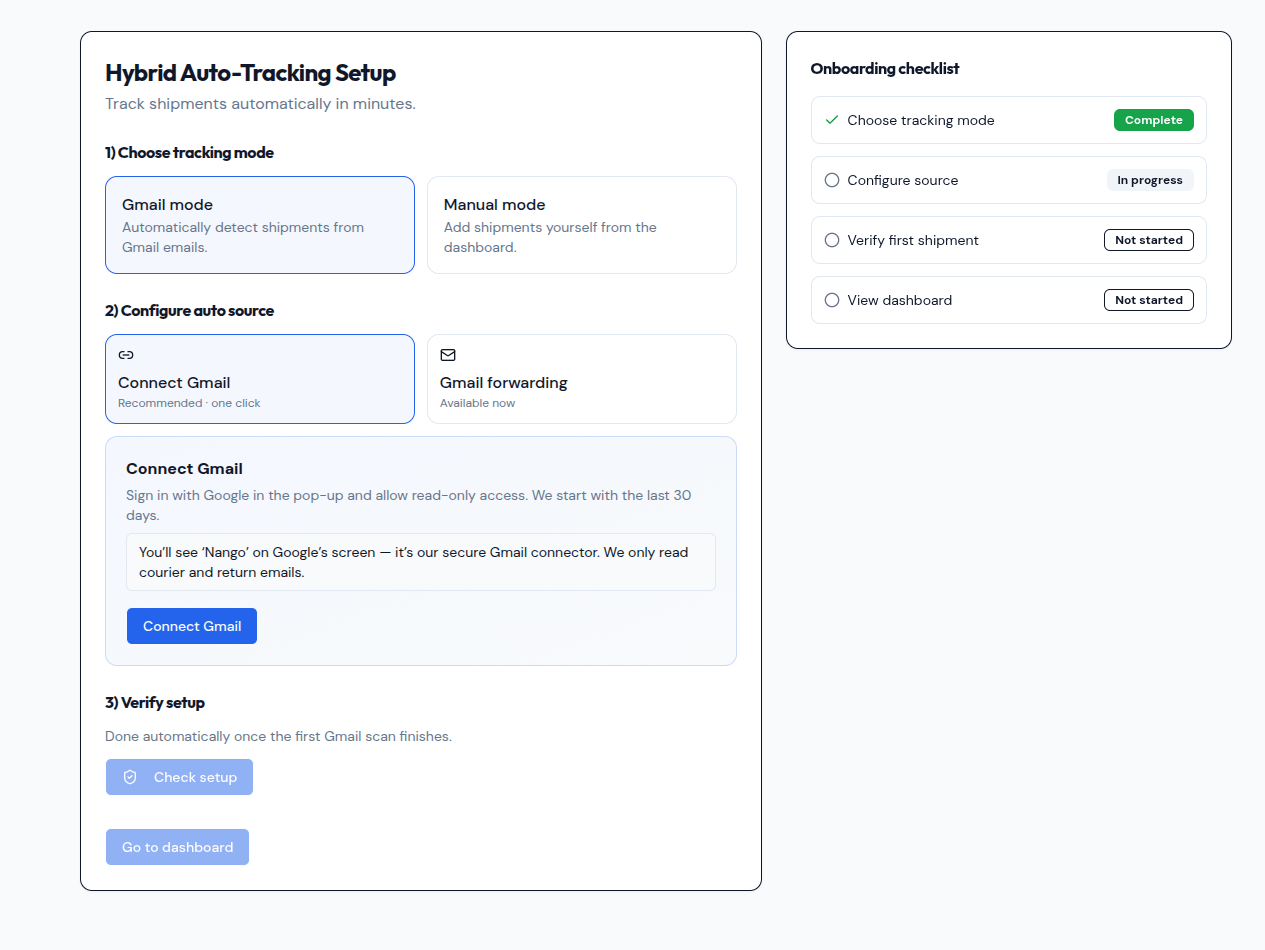
3Approve access in the pop-up
Click Connect in the 'Link Gmail Account' window, then sign in with Google and allow read-only access. If nothing opens, allow pop-ups for cleartrackai.in in your browser.
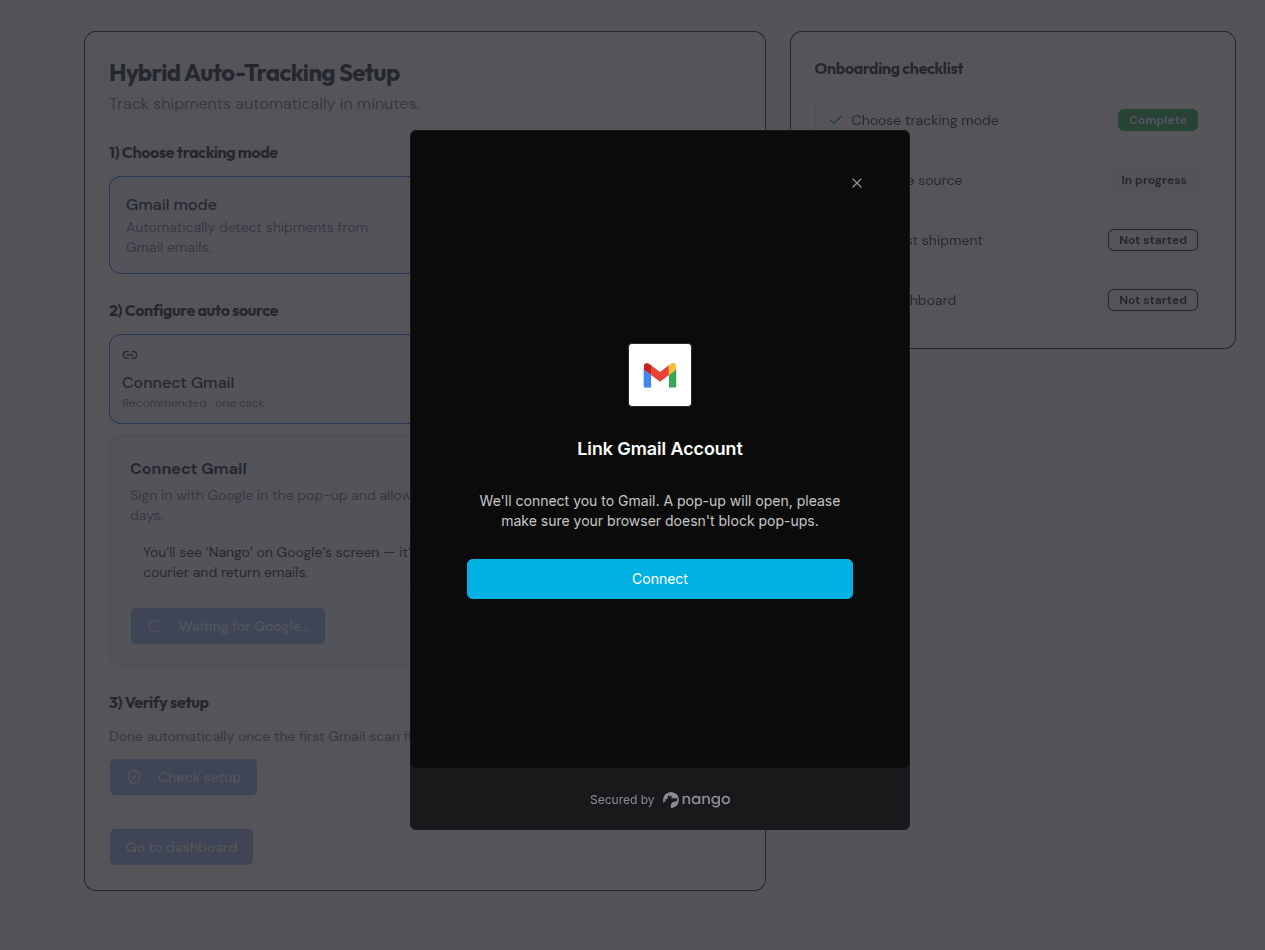
4Confirm Gmail is connected
The button changes to Gmail connected. We scan your last 30 days of courier and store emails, then check for new ones every 2 hours. Click Check setup, then Go to dashboard.
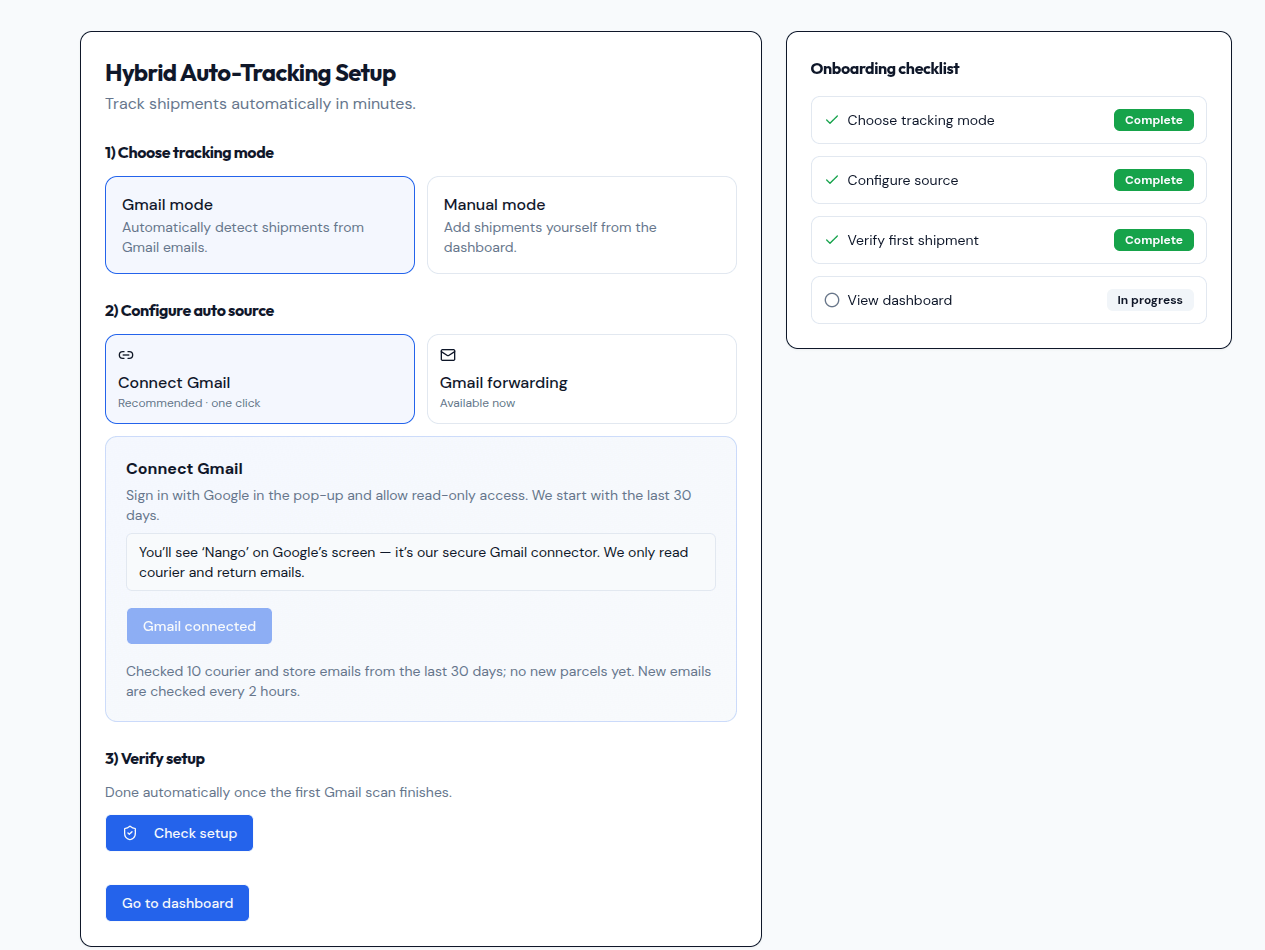
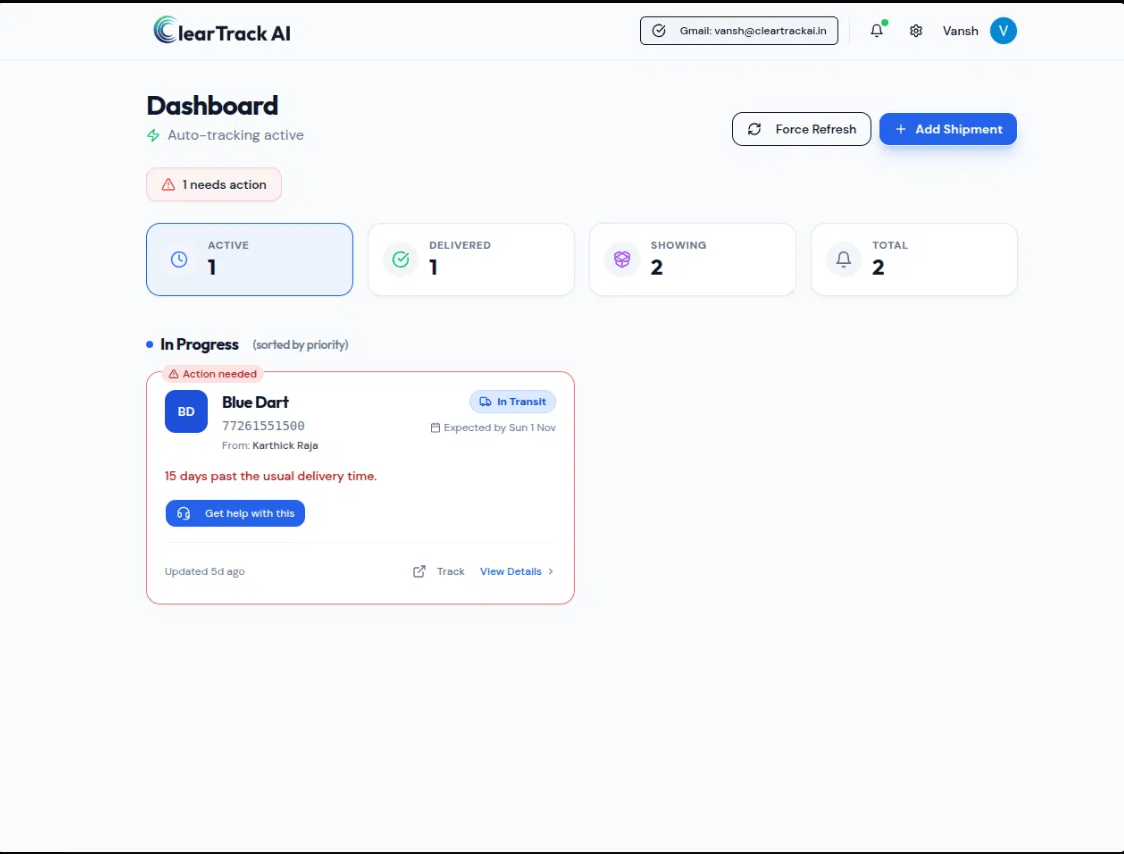
5See your parcels on the dashboard
Your dashboard now shows Auto-tracking active. Shipments found in your emails appear automatically, and delayed ones are flagged with 'Action needed'.
Prefer not to connect Gmail? Use Gmail forwarding instead. Pick it in step 2 of the setup.